Terraria Tutorial:
Making Corruption, Crimson, or any other Biome
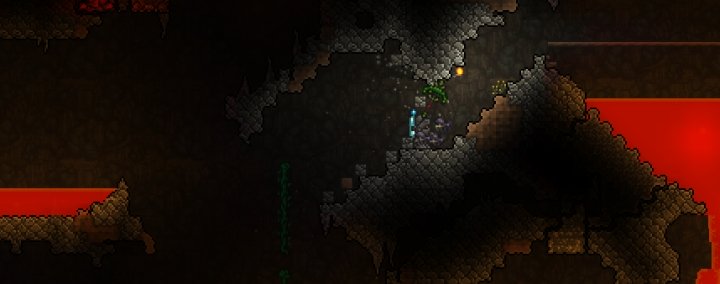
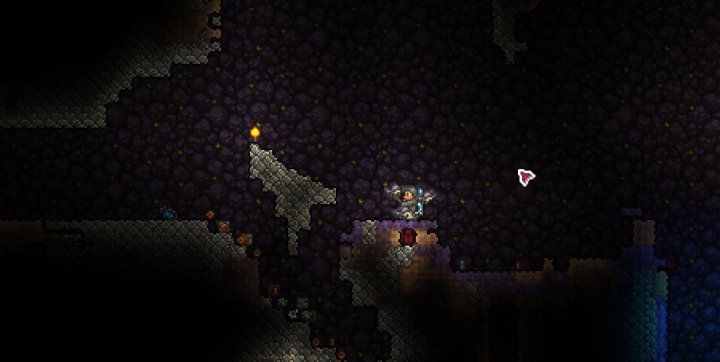
 A Corruption Biome that I made in my Crimson World, just to test how it all worked.
So you've got a Corruption or Crimson World and want to have the other Biome present for farming materials and/or rare drops. This is entirely doable! This tutorial will teach you how Terraria decides where to spawn monsters, what type of biome it is, and how you can get a Corruption or Crimson (mainly underground varieties) going in your world.
How Terraria Handles Spawns & Determines Biomes
Terraria handles spawning off-screen, based on the block types outside of your view. The type of monsters that spawn are determined by the Biome those blocks are considered to occupy. Biomes are basically big collections of blocks within a given area, and have their own background, music, and monsters. Once a certain block threshold is met, monsters from that biome will start spawning from those types of blocks, and when you're nearby you can see the background has changed. Some biomes are compatible with one another - for example you can have Cavern enemies spawn in an Underground Crimson Biome, Snow enemies in a Corruption.
While it takes many more blocks for these 'normal' Biomes to change their background and spawns, Corruption and Crimson only require a few hundred blocks! That's easy to attain, so long as you have at least a Deathbringer or Nightmare pickaxe. These are craftable after beating Brain of Cthulu or Eater of Worlds. It is best done after the start of Hard Mode, because of the stripes of Hallow/Corruption that will spread when you initiate it.
Getting Materials
To get started, simply head off to Terraria's main menu and generate another world, preferably a small one, to investigate with your character. Hope it's the opposite kind you have in your main world, and if not make another and delete that one unless you like it. Mine the Crimstone/Ebonstone blocks of the area once you find one, then take them to your main world by leaving the game with them in your inventory. If you simply have those, you're good to go on making your own Biome. There is no need to wait on a Blood Moon and buy the seeds from the Dryad. Just get Crimstone/Ebonstone and save/exit.
Corruption/Crimson Spreads
Once you enter Hard mode, Corruption and Crimson spread rather fast, but not so fast you should worry. It slows after killing Plantera. They will jump up to 3 tiles away and convert stone to ebonstone/crimstone and their special grass will take over dirt. Some types of tiles can't be converted, but that's outside the scope of this tutorial. Point is - stone and dirt do convert, and you only need one corrupted rock to do it but more results in faster conversion.
Surface Biome
All you need to do to get an above-ground one going quickly is build it in the sky - not so far Harpies will spawn, but far enough that it can't spread and ground monsters won't spawn either. You can, of course, do it directly on the surface, but it would be wise to carve around it so that it cannot spread - at least 4 spaces to prevent any mistakes. If you want grass to spawn, layer corrupted rock then dirt on top. The rock you place will transform a layer of dirt above into the evil grass, resulting in mushrooms growing which are mainly used to summon the two bosses unique to Corruption and Crimson (Eater of Worlds and Brain of Cthulhu). If you have a Crimson World and want Worm Teeth to make Thorns Potions, you will need a surface Corruption, as the World Eater spawns instead of the Devourer in the Underground Corruption.
Custom Underground Biome
If you're going through the trouble of doing this, you probably want the best material and gear drops available, and those typically come from underground monsters. All varieties will spawn, including mimics which can drop unique accessories and weapons. While I'm making an underground Corruption Biome in this tutorial, the process is the same for Crimson. The key is to go deep.
Step 1: Find the Spot
Use your map or explore to find a suitable location. Look to your world's Cavern layer for an area that is neither Corruption/Crimson nor Hallow, preferably with some nice tunnels already there so that it's easier to carve it out.
 For making an Underground Biome, it is key that you search the Cavern layer for an area not touched by the Hallow or Crimson/Corruption. Begin mining out the area once you're set on where to do this. If there's lava, you can also drain that so that you have more surface area to place blocks and allow monster spawns. It could even become a pool for fishing!
Step 2: Carve it Out
We want to use natural tunnels and widen areas to make them more than 4 spaces wide so that the area will be contained (a little extra room for padding). It should be large enough that monsters can spawn off screen - so at least 2 screens wide, both vertically and horizontally. You can't go too big, so long as you're containing it. It is just harder to do so if you make it too large: more room for you to make a mistake. Still, you can use the Clentaminator to take care of it should you later find it spreading out of hand.
 Carve it out, and make a couple of passes to make sure you didn't miss any spare blocks. Circle the area and, when you're good, you can begin.
Step 3: Quality Control
As I make a couple of laps around the area, I'm widening the tunnels, so that the Corruption area I'm making can not spread. I've already got my hands full with 25% Crimson. There are plenty of natural gaps here, so I keep it simple and mine upward, do a bit of flying to carve vertically, and watch for stray blocks that may serve to let the Corruption hop in between blocks and spread beyond the area where I want it to spread.
 Start placing the Corruption Blocks on top of the stone. We needed extra space in the tunnels to make up for a layer of Ebonstone Blocks, which could cause it to be too close and allow it to spread.
Step 3: Place the Crimstone or Corruption Blocks
Now that I'm satisfied that the area is clear, I can begin placing my Crimstone Blocks. I lay them on stone in the area I designated, concentrating on one are first then planting 'seeds' of corruption by putting a few blocks here and there throughout the area. This will facilitate the spread, which will happen over time.
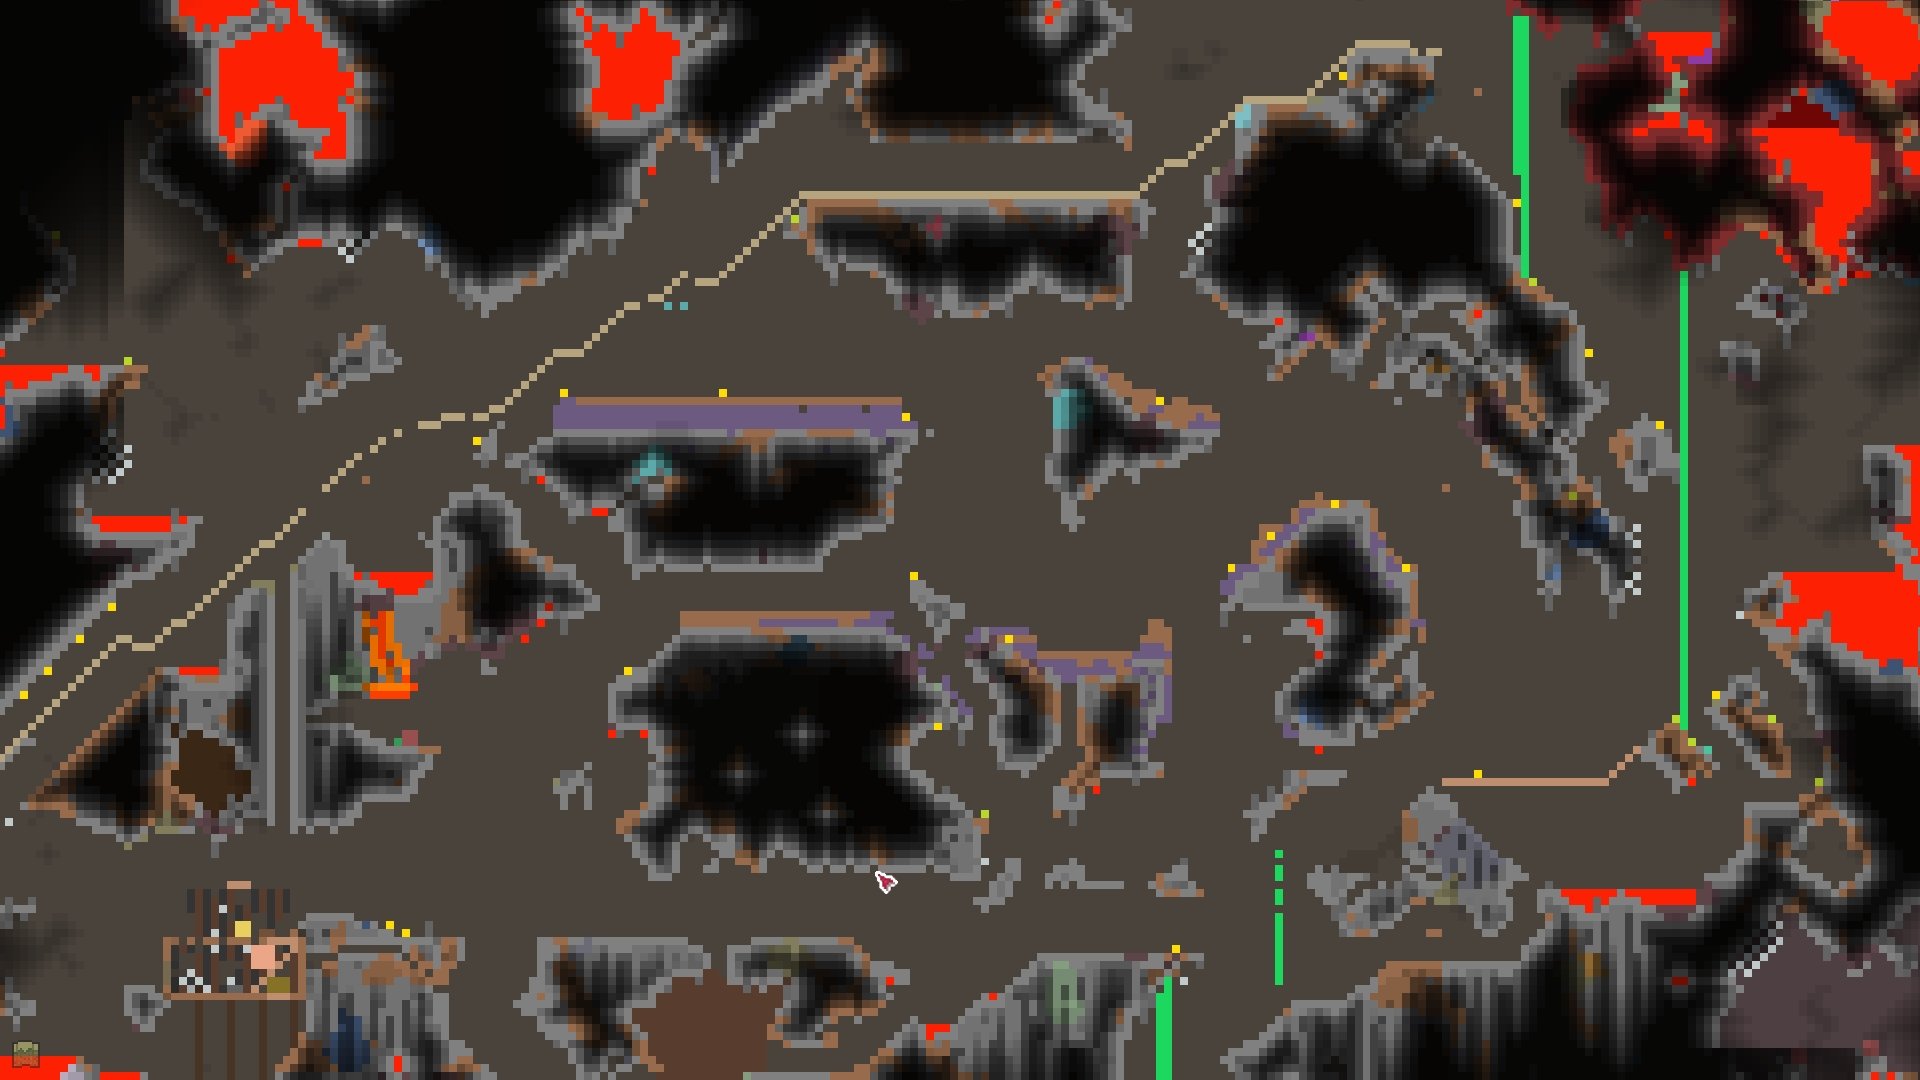 You can see there is plenty of space here, and where I initially placed the most blocks in order to get enough block density to make it work immediately.
This area in the center - note the purple - will now begin to spread the Corruption. I have placed over 500 blocks by the time I'm done, so it's plenty. One thing to make sure of, is that there are corruption blocks on top of the stone off screen so that enemies can spawn there. Otherwise, cavern enemies will spawn as it seems to look at the type of ground that is available, regardless of if the background changes. So you're standing there waiting on World Feeders to spawn to get Cursed Flames, and instead get loads of cave bats.
 Success! The background changed from the normal Cavern one to a Corruption background, largely because of the area where I put a concentration of blocks. I placed blocks along all the major pieces of land within this area so that it will spread and Corruption monsters will spawn more reliably.
I hope this was helpful. It can be very handy - players who lack Crimson cannot make Rage Potions (from Fishing, +10% Critical Chance) nor get Ichor without going to another world and making it Hard Mode. Players without Corruption can't make the Wrath Potion from fishing which gives +10% damage, nor Flask of Cursed Flames, which is a melee flask that delivers a powerful damage over time attack. Plus, the Mimics. All in all, very handy to make all materials available in your world. You can even summon the pre-Hardmode bosses if you make a surface biome to collect mushrooms to craft the summoning items, though that is less useful later in the game.
Share Tips and FAQs
Our Sims Forum is the place to go for faster answers to questions and discussions about the game. Use the form below to share your own experiences and provide helpful tips to other readers.
Nothing yet.Join In
Search the Guide
Latest Guides
Follow @carlsguides
Moon Lord
Boss Arena for Moon Lord
Lunatic Cultist (w/ Video)
Farming Biome Keys & Mimics
Tips & FAQS - In Development
Boss Summoning Items New
Mining - New
NPCs & Valid Housing
Good Potions for Miners
Progression Checklist
Making Money in Terraria
Entering Hard Mode
Potions for Boss Battles
Future Plans for the Guide
My Guide was started on Sept 23, 2015 and now includes dozens of pages about the game. I hope I can help newcomers to get a bit more enjoyment ouf of Terraria by demystifying some of how it works. You can provide feedback to me at [email protected]. I am tied up with multiple projects - this, The Sims 4, and Fallout 4 but do plan to return to Terraria and finish the boss guides and some other pages.
